The Complete Guide to Bearded Dragon Egg Incubation Period
This post contains affiliate links. As an Amazon Associate, we earn from qualifying purchases.
The bearded dragon egg incubation period runs 55 to 75 days at a steady 83–84°F (28–29°C). This 20-day window is controlled by temperature consistency, substrate humidity, and never rotating the eggs after they are laid. Cooler temperatures stretch the timeline toward 90 days; hotter temps risk fatal developmental issues and can shorten it unpredictably.
Most first-time breeders fixate on the calendar. They mark day 55 and start panicking when nothing happens. The real variable isn’t the date, it’s the stability of your incubator’s microclimate over those two months. A three-degree drop overnight or a spike in humidity can reset the embryo’s metabolic clock, adding a week of waiting or, worse, stalling development entirely.
This guide walks through the week-by-week timeline, the non-negotiable setup steps most tutorials gloss over, and the physical signs that tell you more than any countdown. We’ll cover how to build a reliable incubator, candle eggs correctly, and handle the chaotic 48 hours when hatchlings finally emerge.
Key Takeaways
- The 83–84°F (28–29°C) range is the metabolic sweet spot for a 55–75 day hatch. Stray outside 82–86°F and you alter development speed, hatchling sex, and survival odds.
- Never turn a bearded dragon egg. Unlike bird eggs, the embryo attaches to the inner membrane at the top within hours. Rotating it severs the connection and kills the hatchling.
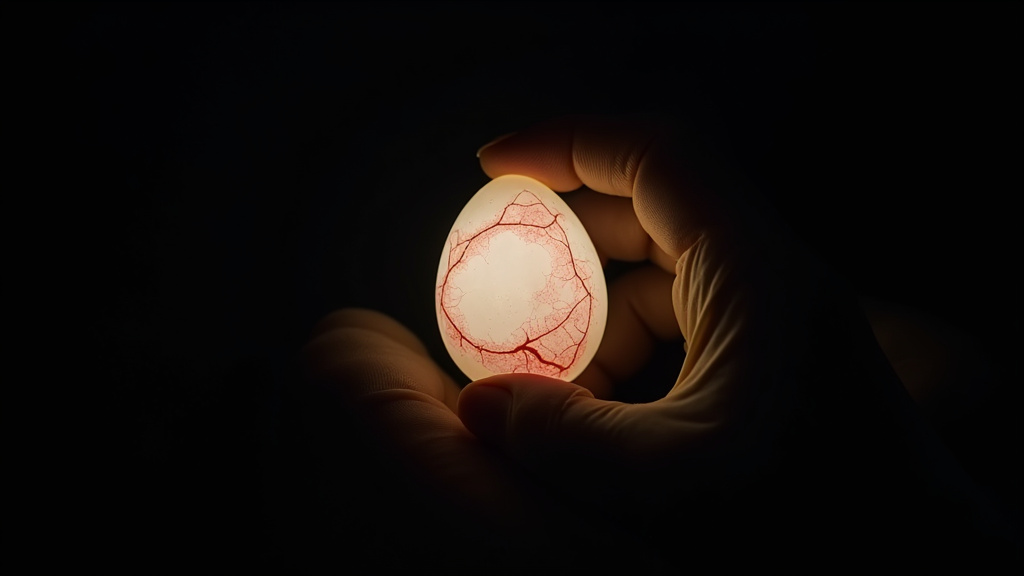
- Candle at days 7, 14, and 28. Fertile eggs show a network of pinkish-red veins and a dark embryo mass by the second week. Clear or uniformly yellow eggs are infertile, remove them before they mold.
- 70–80% humidity is maintained by weight, not guesswork. Mix vermiculite and water at a 1:1 ratio by weight (e.g., 100g vermiculite to 100g water). This prevents eggs from collapsing or growing fungus.
- Leave hatchlings in the incubator for a full day after emerging. They need to absorb their yolk sac fully, and their movement encourages remaining clutchmates to pip.
Before the Eggs: Setting Up for Success
Your incubation timeline starts a week before the female even lays. An incubator needs time to stabilize. The common mistake is setting it up the day you find eggs, that guarantees temperature and humidity swings during the most critical first 96 hours of development.
A dedicated reptile incubator like a modified Hova-Bator (with the automatic turner disabled and removed) is the baseline. Chicken egg incubators are built to rotate eggs every few hours; that function is fatal for reptile eggs. You need a still-air incubator where the eggs sit motionless. The digital thermostat must be accurate to within half a degree Fahrenheit. The analog dials on cheap incubators drift with room temperature, unacceptable over a 60-day run.
Before you start: An incubator’s heating element runs on AC current and can short if condensation drips onto it. Use a waterproof probe for the hygrometer and route cables through sealed ports. Always plug the incubator into a GFCI outlet. A spilled water dish inside a plastic incubator can lead to an electrical fault within 30 minutes.
Mix your substrate by weight, not volume. Vermiculite holds moisture more evenly than perlite, but both work. The formula is 1:1 by weight, 100 grams of dry vermiculite to 100 grams of distilled water. Tap water minerals can promote mold. Squeeze a handful; it should clump without dripping. That’s your 70–80% humidity buffer. Place it in a plastic shoebox or deli cup with a few small holes punched in the lid for slight air exchange. This container sits inside the incubator.
TL;DR: Run your incubator with substrate for 48 hours before eggs arrive. Verify 83–84°F and 70–80% humidity with a calibrated digital probe. This head start prevents lethal swings during early embryogenesis.
The 55–75 Day Countdown: What to Expect Week by Week
The incubation period for bearded dragon eggs is a countdown driven by embryo metabolism. Think of temperature as the throttle. At 84°F, development hits a standard pace. At 82°F, everything slows. At 86°F, it accelerates, but with risks.
Here’s the week-by-week progression you’ll see with consistent optimal incubation temperatures.
| Week | External Egg Signs | Internal Development (via Candling) | Action Required |
|---|---|---|---|
| 1–2 | Glossy, firm, pure white. | Day 7: Pink web of veins visible. Day 14: Dark embryo mass clear at one end. | Mark egg tops with pencil. Remove any clear/yellow eggs. |
| 3–6 | Shell may dull slightly. | Vein network thickens, fills entire egg. Embryo grows, may show slight movement. | Maintain humidity. No handling. Record temperature twice daily. |
| 7–8 | Eggs begin to dimple or collapse slightly. | Embryo is large, veins may be harder to see. Egg feels heavier. | Increase air exchange if condensation pools on lid. |
| 9–10 | Noticeable dimpling, papery shell texture. | Little to see—embryo fills space. Pip hole may appear. | Do not assist. Prepare hatchling enclosure. |
| Hatch | Pip hole widens, hatchling emerges over 12–48 hrs. | — | Leave hatchling in incubator 12–24 hrs post-emergence. |
The 55-day mark is the early window. It typically happens with temperatures steady at 85–86°F. Most clutches will hatch between days 60 and 65 at 83–84°F. If you hit day 70, check your thermometer calibration, you might be running at 82°F or below. Development pauses below 80°F, and embryos may not survive a long cold stall.
I ran a clutch at an average of 82°F once because my thermostat probe was touching the incubator wall. The hatch dragged to day 81. Three eggs never pipped, and the hatchlings that did emerge were smaller and less vigorous. A two-degree error cost three weeks and weakened the entire clutch.
The embryo attaches to the top inner membrane of the egg within 12 hours of laying. Rotating the egg tears this attachment, starving the embryo of oxygen. The death isn’t immediate, the egg may continue to look normal for weeks before collapsing suddenly in week 6.
TL;DR: Week 1–2 for vein confirmation, Week 3–6 for quiet growth, Week 7–10 for dimpling and hatch prep. Temperature dictates your place on the 55–75 day map.
Temperature and Humidity: The Non-Negotiable Numbers
Incubation is a chemical process. Enzyme activity, gas exchange, and yolk absorption all depend on two physical variables: heat and water vapor. Getting them right isn’t just best practice, it’s the difference between a full clutch and a box of moldy failures.
The ideal temperature range is 82–86°F (28–30°C), with a bullseye at 83–84°F. This isn’t a suggestion. At 87°F, metabolic rate spikes. The embryo consumes its yolk too fast and can develop skeletal deformities. At 90°F, proteins denature and the embryo dies, often within a day. On the cold side, 81°F slows cell division. Below 80°F, development may halt entirely, leading to dead-in-shell embryos weeks later.
Temperature also determines sex through temperature-dependent sex determination (TSD). The pivot point is around 84°F.
– 82–83°F: Predominantly male hatchlings.
– 84–85°F: Mixed sex ratio.
– 86°F+: Predominantly female hatchlings.
If you want to influence sex, you do it with a deliberate, stable temperature shift, not by accident because your incubator is in a sunny spot.
Humidity keeps the eggshell membrane pliable for gas exchange. 70–80% relative humidity is the target. Lower than 60%, and the egg loses moisture too quickly. The shell hardens, the embryo shrinks, and the egg collapses inward by week 4. Higher than 85%, and the shell doesn’t lose enough moisture. The egg swells, becomes prone to bacterial invasion, and often ruptures during late development.
Common mistake: Spraying eggs directly with water to raise humidity, this blocks the egg’s pores and can introduce pathogens. Always add moisture to the substrate around the container, never onto the eggs themselves.
Use a digital hygrometer with a remote probe placed at egg level. The cheap stick-on analog gauges are unreliable, often off by 15% or more. For a DIY fix, the salt test calibrates a hygrometer: seal it in a bag with a spoonful of wet salt slurry for 8 hours; it should read 75%.
| Problem | Likely Cause | Fix | Timeline for Recovery |
|---|---|---|---|
| Eggs collapsing, dimpling early | Humidity too low (<60%) | Re-mix substrate 1:1 by weight, enclose container tighter. | Stabilizes within 24 hrs, but existing dimpling may remain. |
| Condensation pooling on lid, eggs look sweaty | Humidity too high (>85%), poor air exchange | Add a few more small holes to container lid, slightly loosen incubator vent. | Humidity should drop to target within 6–12 hrs. |
| No development by day 14 | Temperature too low, or eggs infertile | Verify probe placement, calibrate thermostat. Candle to confirm infertility. | If temp was <80°F, raising to 84°F may restart development with a 7–10 day delay. |
| Mold on one egg spreading | Infertile egg left in, high humidity | Remove moldy egg immediately, wipe neighboring eggs with dry paper towel, check substrate for foul smell. | Contamination can spread to fertile eggs in 48 hrs if not removed. |
Choosing a reliable egg incubator is the foundation. The best ones have solid-state thermostats and sealed wiring. Your reptile egg incubator models should be vetted for steady performance, not fancy features.
Candling: Your Week-by-Week Window into the Egg
Candling is your only way to see life inside the egg without opening it. You need a bright, focused LED flashlight in a dark room. Hold the egg gently against the light after day 5.
Week 1 (Days 5–7): A fertile egg shows a faint spiderweb of pink or red veins, usually near the top. It looks like a tiny red map. An infertile egg is clear or has a uniform yellowish glow without any defined structures. If you see a yellow ring or a blood ring, that’s an embryo that died very early, remove it.
Week 2 (Days 10–14): The vein network is dense and covers more of the egg. A small, dark comma-shaped embryo is visible at one end, often with a visible eye spot. The egg feels slightly heavier.
Week 4–6: The embryo grows and may move slightly when candled. The veins become harder to distinguish as the baby fills the space. The eggshell may start to look mottled or have a pale band.
I candled a clutch every three days out of excitement once. The constant light and handling didn’t kill them, but one egg developed a hairline crack from the pressure. It molded by week five. Now I candle once a week, gloved, and support the egg in a foam ring to avoid squeezing.
TL;DR: Candle at day 7 to confirm fertility, day 14 to check growth, and day 28 to confirm viability. Remove any clear, yellow, or moldy eggs immediately to protect the rest.
Hatching Day: The Final 48 Hours
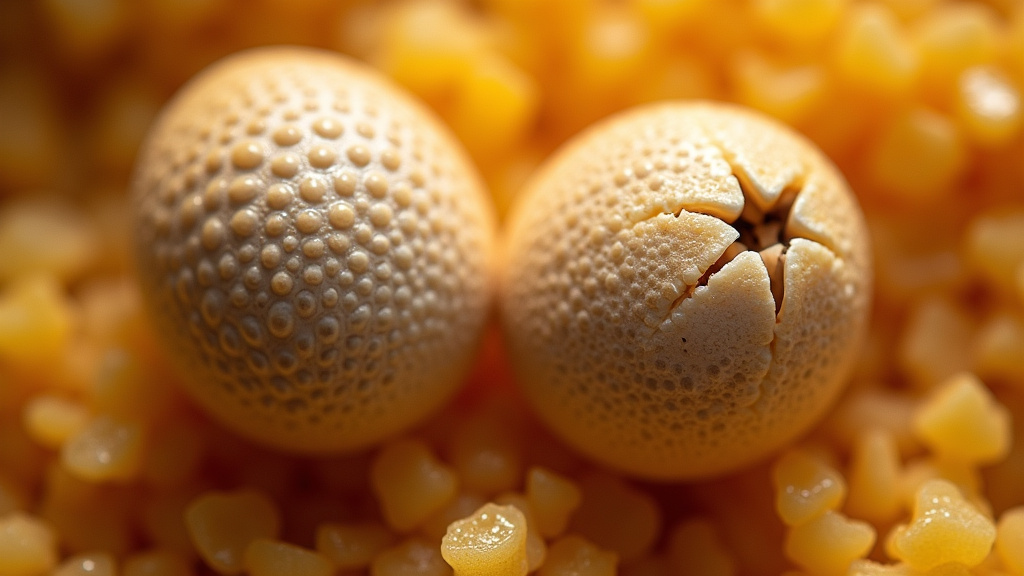
The eggs will dimple noticeably 24–48 hours before hatching. This is the embryo absorbing the remaining yolk and taking its first breaths of air through the shell. Then you’ll see a tiny pip, a star-shaped crack where the hatchling’s egg tooth broke through.
Do not help. Do not peel the shell. The hatchling needs to emerge on its own over the next 12–48 hours. This struggle ensures its yolk sac is fully absorbed and its lungs are ready. Peeling the shell early can cause umbilical bleeding and a yolk sac infection, which is fatal within days.
The first hatchling’s movement and scent often trigger the rest of the clutch to pip. Leave all hatchlings in the incubator for 12–24 hours after they emerge. They’ll be lethargic, with a noticeable yolk sac bulge on their belly. This is normal. Transfer them to a simple care for hatchlings setup only when the sac is fully absorbed and they are actively moving.
Prepare the nursery enclosure before hatching:
– 10-gallon tank with paper towel substrate (no loose particles).
– Basking spot of 100–105°F via a low-wattage bulb.
– Tiny pinhead crickets dusted with calcium, offered twice daily.
– Shallow water dish.
Check for signs of healthy hatchlings: alert posture, clear eyes, strong limb movement, and a voracious appetite within 48 hours of leaving the incubator.
What to Do With Infertile Eggs and When to Give Up
A female bearded dragon can lay infertile eggs (slugs) even without a male. These are smaller, often yellower, and will not show veins when candled. Remove them as soon as you confirm infertility, by day 10 at the latest. They will mold and can contaminate the entire incubator.
If no eggs have pipped by day 80, candle the entire clutch. If you see fully formed but motionless hatchlings inside, the clutch may have died late-term due to humidity or temperature spikes. If the eggs are still firm and show veins, you may be running too cold. Bump the temperature to 84°F and wait another week. Sometimes a slow clutch just needs more time.
Common mistake: Discarding eggs at day 70 because they dimpled and look dead. Late dimpling is normal. Candle one egg carefully, if you see movement or a dark mass, wait. I’ve had a healthy hatchling emerge on day 78 from a deeply dimpled egg I almost tossed.
The Mother Dragon: Post-Laying Care
The female’s job is exhausting. She needs immediate care after laying to prevent egg-binding in future clutches. Offer a warm bath to rehydrate her. Provide a massive, calcium-dusted meal, collard greens, dubia roaches, and a pinkie mouse for protein if she’ll take it. Her calcium reserves are depleted.
Watch for burrowing for egg-laying that continues after the clutch is out. That can signal retained eggs. A vet visit is wise if she seems lethargic or refuses food for more than two days post-lay. Proper bearded dragon husbandry includes this recovery phase.
Frequently Asked Questions
Can bearded dragon eggs hatch after 80 days?
Yes, but it’s uncommon and usually indicates the incubator ran at the cooler end of the range (82°F or below). As long as the eggs are still firm and show signs of life when candled, continue incubating. Hatchlings after day 80 may be smaller but can be perfectly healthy.
What happens if you turn a bearded dragon egg?
Turning the egg after the first 12 hours detaches the embryo from the chorionic membrane at the top of the egg. This severs its oxygen and nutrient supply. The embryo will die, though the egg might not collapse or show mold for several weeks.
How do you know if a bearded dragon egg is alive?
Candle it in a dark room with a bright LED light after day 5. A live egg shows a network of pink or red blood vessels. By day 14, a dark embryo mass is visible. A dead or infertile egg is clear, uniformly yellow, or shows a detached blood ring.
Do bearded dragon eggs need light during incubation?
No. Incubation happens in total darkness. Light exposure during candling is brief and harmless, but constant light can raise temperature and stress the embryo. Keep the incubator closed and in a dim room.
Why are my bearded dragon eggs deflating?
Moderate dimpling in the final week is normal as the hatchling absorbs yolk and fluid. Severe deflation or collapsing earlier indicates dangerously low humidity (below 60%). Re-mix your substrate to a 1:1 water-to-vermiculite ratio by weight and ensure the container is sealed.
The Bottom Line
The bearded dragon egg incubation period is a 55–75 day exercise in environmental control. Your thermostat and hygrometer are more important than the calendar. Set your incubator at 83–84°F with 70–80% humidity a week before the eggs arrive. Never turn an egg after marking its top. Candle weekly to remove infertile eggs and track development. When hatching begins, resist the urge to help. The hatchlings will emerge on their own schedule, and your job is to keep their world stable until they do. Success isn’t about luck, it’s about nailing those numbers and then having the patience to wait.