A Full Guide on Bearded Dragon Egg Incubation Temperatures
This post contains affiliate links. As an Amazon Associate, we earn from qualifying purchases.
The optimal bearded dragon egg incubation temperature is 82°F to 88°F (28°C to 31°C), with 84°F (29°C) being the ideal target for balanced sex ratios and strong hatchlings. Maintaining this range within a one-degree variance for the entire 55 to 75-day incubation period is non-negotiable for success.
Most failed incubations trace back to a single, fixable error: assuming the thermostat’s reading is gospel. The number on the display means nothing if the heat isn’t even. You can set it to 84°F and still cook one side of the clutch while the other side chills.
This guide walks through the exact temperatures, the science behind them, and the physical setup that keeps those numbers rock-solid. We’ll cover how to choose an incubator, prepare the substrate, and troubleshoot the common thermal problems that kill embryos before you even know they’re in trouble.
Key Takeaways
- Target 84°F (29°C) within a one-degree window for the entire incubation. Fluctuations outside 82–88°F risk dead or deformed hatchlings.
- Temperature dictates sex: 80–84°F yields a mix, above 88°F produces mostly females with higher defect risk, and below 78°F yields mostly males with high mortality.
- Use a reptile-specific incubator with a proportional thermostat, never a chicken egg incubator that turns eggs. Calibrate it for 24 hours before adding eggs.
- Maintain 70–80% humidity using a 1:1 weight mix of vermiculite and water. Check it with a digital hygrometer, not guesswork.
- Never turn, roll, or flip bearded dragon eggs. Mark their top when laid and keep them in that exact orientation.
The Ideal Temperature Range for Bearded Dragon Eggs
Forget a single perfect number. You’re managing a narrow band where life happens. The Reptile How bearded dragon incubation guide confirms the safe window is 82°F to 88°F (28°C to 31°C). Inside that band, 84°F (29°C) is the sweet spot.
At 84°F, metabolic processes run at the rate evolution expects. Hatchlings pip around day 60 with strong yolk absorption and coordinated movement. Stray just a few degrees and the timeline stretches or snaps.
Incubation temperature directly controls embryo development speed and hatchling sex in bearded dragons through temperature-dependent sex determination (TSD). Consistent heat between 82°F and 88°F ensures normal organ formation, while deviations cause developmental delays, physical deformities, or lethal overheating.
TL;DR: Keep it at 84°F. A one-degree swing is fine; a five-degree swing is a death sentence.
Why Temperature Stability Beats the Perfect Number
A steady 83°F beats a shaky cycle between 82°F and 86°F every day. Embryos are calibrating their cellular machinery to a specific thermal environment. Change that environment, and you force a recalibration that consumes energy and introduces errors.
The first clutch I ever incubated was in a borrowed Hovabator Genesis 1588. The thermostat clicked on and off, creating a three-degree swing every hour. The hatchlings that emerged were weak. Two had kinked tails, and several struggled to break out of their eggs. The problem wasn’t the average temperature, it was the constant change. Now I use a incubator with a proportional thermostat, and the difference in hatchling vigor is unmistakable.
The Consequences of Getting It Wrong
Let’s talk about failure modes. They have specific symptoms and timelines.
| Temperature | Likely Outcome | Visible Signs & Timeline |
|---|---|---|
| Below 78°F (25.5°C) | Developmental arrest, high mortality, predominantly male | Development slows or stops. Eggs may collapse after 3+ weeks. Any hatchlings are often runts. |
| 80°F – 84°F (27°C – 29°C) | Healthy mixed-sex clutch, strong hatchlings | Steady growth candling at 10 days shows strong veining. Hatch around day 55–75. |
| 86°F – 88°F (30°C – 31°C) | Mostly female, faster development, higher risk of defects | Hatch as early as day 40–50. Watch for kinked spines or limb deformities. |
| Above 90°F (32°C) | Embryo death, egg explosion | Eggs may turn yellow and foul within a week. Overpressure can cause shells to rupture. |
Common mistake: Chasing a “mostly female” clutch by pushing to 87°F, the defect rate climbs sharply, and you can lose the entire clutch to overheating in a single afternoon if the thermostat spikes.
How Temperature Determines Sex (TSD)
Bearded dragons use temperature-dependent sex determination (TSD). There are no sex chromosomes at play here. The incubation temperature during a critical middle-third of development chemically triggers the embryo to develop as male or female.
The mechanism involves the enzyme aromatase. Higher temperatures increase its activity, converting androgens into estrogens, which drives ovarian development. Lower temperatures mean less aromatase, so the default pathway leads to testes.
This isn’t a subtle bias. It’s a switch.
– Cool Female Zone: Doesn’t really exist for bearded dragons. That’s a turtle thing.
– Mixed / Pivotal Range (80°F – 84°F): This is the natural, safe zone. You’ll get a fairly even mix of males and females. This is where you should aim unless you have a specific, informed breeding reason not to.
– Warm Male Zone: Also not applicable. The pattern is reversed.
– Hot Female Zone (Above 86°F): Higher temperatures skew heavily female. At 88°F, you might see 90% or more females.
Trying to manipulate sex is an advanced breeder’s game with real stakes. Pushing to 87°F to get females cuts the egg incubation period by two weeks, but it also stresses the embryos. The result is often a smaller hatchling with a weaker immune system.
How to Set Up Your Incubator
Your equipment choice is the foundation of temperature stability. A proper setup removes guesswork and protects against household temperature swings.
Choosing the Right Incubator
You need a reptile-specific incubator. Chicken egg incubators have automatic turners that will kill your embryos. Full stop.
There are two reliable paths:
1. Commercial Reptile Incubator: Models like the Reptibator Zoo Med are designed for this. They have a proportional thermostat that modulates power instead of just clicking on/off, giving you that crucial ±1°F stability.
2. DIY Conversion: You can convert a well-insulated cooler or mini-fridge using a high-quality external thermostat like the Zoo Med ReptiTemp 500R. This is cheaper but requires more technical skill to ensure even heat distribution.
I’ve used both. The DIY route works, but you must run it for at least 48 hours while mapping temperatures in every corner with a separate digital probe. Commercial models are plug-and-play, which is worth the cost for your first few clutches.
The Critical Calibration Process
Never put eggs into a freshly set-up incubator. The calibration process is non-negotiable.
- Set up the empty incubator in its permanent location, away from vents, windows, and direct sunlight.
- Fill your incubation containers with damp substrate (we’ll make it next) and place them inside.
- Set the thermostat to 84°F.
- Place a digital thermometer probe in the center of the substrate in one container. Place another probe in the far back corner of the incubator.
- Let it run for 24 hours.
- Record the high and low readings from both probes every few hours.
You’re looking for two things: the accuracy of the incubator’s thermostat and the presence of hot or cold spots. If the corner is consistently 3 degrees cooler than the center, you have an air circulation issue. Fix it now with a small computer fan or by repositioning the incubator’s heat source.
Preparing the Incubation Substrate
The substrate buffers temperature and provides critical humidity. Vermiculite is the standard. Perlite works but is less forgiving.
The mix ratio is by weight, not volume. Use a kitchen scale.
1. Weigh out 100 grams of medium-grade horticultural vermiculite.
2. Add 100 grams of distilled water (warm, not hot).
3. Mix thoroughly in a clean bowl.
4. Squeeze a handful. It should clump firmly without dripping any free water. If water runs out, add more vermiculite. If it’s crumbly, add a few more grams of water.
This 1:1 ratio by weight creates the ideal damp sand consistency that holds 70-80% humidity in a sealed container. Pour the mix into your clean, sterilized plastic container (like a deli cup with small holes poked in the lid). Make small divots where each egg will sit.
The Step-by-Step Incubation Process
Once your incubator is calibrated and your substrate is ready, it’s time for the eggs. Handle them only when necessary.
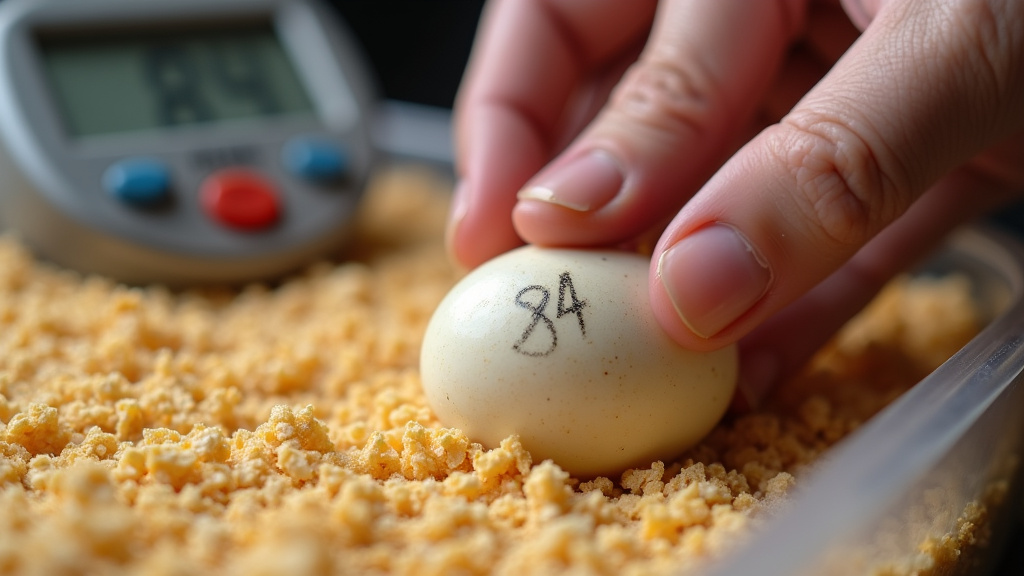
- Gently collect the eggs. Use a soft spoon or your fingers, taking care not to rotate them. Mark the top with a soft pencil if you’re unsure of the orientation.
- Nestle, don’t bury. Place each egg into a pre-made divot in the substrate, so about one-third of it is submerged. The egg should not roll. Do not pack substrate over it.
- Close the container and incubator. Place the lidded container inside the pre-heated incubator. Close the incubator door.
- Establish a monitoring routine. Check the digital readouts twice a day, once in the morning, once at night. Log the temperature and humidity. This takes 30 seconds.
- Manage humidity. If the hygrometer reads below 70%, add a teaspoon of distilled water to a corner of the substrate, not on the eggs. If condensation drips from the lid, open it for 30 seconds to vent excess moisture.
- Candle at day 10. In a dark room, shine a bright penlight through an egg. Healthy eggs show a pinkish interior with a network of red veins. A clear or solid yellow egg is infertile. A dark, murky egg with spots is likely dead.
Common mistake: Opening the incubator daily to “check on them”, every opening drops the temperature and humidity, forcing the system to recover. Look through the window. Trust your logs.
TL;DR: Set it, log it, and leave it alone. Your patience is part of the environment.
Troubleshooting Temperature Problems
Even with perfect setup, problems arise. Here’s how to diagnose them by the clues your eggs and equipment give you.
| Symptom | Most Likely Cause | Immediate Action |
|---|---|---|
| Eggs collapsing or shriveling | Humidity too low (<60%) | Add distilled water to substrate corners. Verify hygrometer accuracy. |
| Condensation dripping on eggs | Humidity too high (>85%) | Open container lid slightly for 15 minutes to vent. Increase ventilation holes. |
| Mold growing on eggs or substrate | Stagnant air, excessive moisture | Remove any moldy eggs immediately. Increase air flow (add holes). Ensure substrate is damp, not wet. |
| Incubator struggling to reach temperature | Room too cold, incubator underpowered | Move incubator to a warmer room (70°F+). Do not wrap it in blankets—this is a fire hazard. |
| One side of clutch developing faster | Hot spot in incubator | Rotate the entire container 180 degrees (do not turn individual eggs). Re-calibrate incubator after this clutch. |
If development seems to stall after candling shows initial veins, the temperature might be too low. Bump it up by one single degree, from 83°F to 84°F, for example. Wait another week before candling again. A drastic change will shock the embryos.
This is also when knowing the signs of a healthy bearded dragon starts to matter for the hatchlings soon to emerge. Vigor begins in the egg.
What to Do When Hatching Begins
You’ll see a small slit, or “pip,” in an egg. The hatchling will take 24 to 48 hours to fully emerge. Do not help it. Cutting it out early can cause fatal yolk-sac hemorrhage.
Keep the incubator closed. The increased activity and open eggs will raise humidity temporarily, that’s fine. Do not add water. Once the hatchling is fully out, leave it in the incubator for up to 24 hours until its yolk sac is fully absorbed and it’s moving actively.
Then, move it to a simple, clean housing for juveniles with paper towel substrate, a low basking spot, and shallow water. Their first meal might not be for a day or two, which is normal. Offer small, appropriate insects as outlined in a proper baby bearded dragon diet.
Frequently Asked Questions
What is the absolute highest temperature bearded dragon eggs can survive?
Temperatures at 90°F (32°C) are lethal. The proteins in the embryo denature, they cook. Even sustained temperatures of 88°F carry a significant risk of physical deformities like kinked spines. The safe ceiling is 88°F, and the ideal target is well below it.
Can I use a heat mat under a box instead of an incubator?
You can, but you become the thermostat. The thermal gradient in a box is extreme, the eggs on the bottom will be much hotter than those on top. It requires multiple thermometers and constant, obsessive adjustment. For the sake of the clutch, a dedicated incubator is the right tool for the job. It’s the difference between a consistent full incubation process and a stressful gamble.
How long can eggs survive at room temperature before incubation?
Fertile eggs can survive for 6 to 12 hours at stable room temperature (70-75°F) if they are kept in the orientation they were laid and not allowed to dry out. This gives you time to prepare the incubator. Beyond that, development begins to stall, reducing hatchling viability.
My eggs are at day 70 and haven’t hatched. Are they dead?
Not necessarily. Cooler temperatures, even within the safe range, can extend incubation to 80 or even 90 days. Candle them again. If you still see a dark, veined mass and the egg is full (not collapsed), they are likely still alive. Be patient. Increasing the temperature now will likely kill them.
Does humidity affect temperature readings?
Yes, but not directly on your thermometer. High humidity can make the incubator’s internal environment feel warmer to the thermostat probe, potentially causing it to cycle off prematurely. This is why using a separate, independent digital thermometer probe placed at egg level is critical. It tells you the truth.
Before You Go
Successful incubation hinges on three pillars: the right temperature (84°F), the right humidity (70-80%), and ruthless stability. Your job isn’t to tweak daily but to defend a constant environment for two months. Invest in a good incubator and digital monitors. Mix your vermiculite by weight. Check your logs twice a day, but keep the lid shut.
Remember, temperature doesn’t just grow the embryo, it decides whether it becomes male or female. Straying from the 82-88°F band to chase a specific sex risks the entire clutch. Focus on healthy hatchlings first. Everything else, including planning for their juvenile bearded dragon care, follows from that single, steady number.